If you’ve ever typed what felt like a perfectly clear prompt—only to get an image that’s almost right, but not usable—you already know the real challenge with AI images:
- You want a result with intention.
- You want it consistent across versions.
- You want edits to change one thing without ruining everything else.
That’s exactly where a structured workflow helps. In this guide, you’ll learn how to generate images using Seedream 5.0 AI Image Editor, how to approach text-to-image vs image-to-image, and how to finish your assets faster by pairing Seedream with HeyDream’s supporting tools.
What Seedream 5.0 is good at (Explain in Seconds)
Seedream 5.0 is positioned as a modern image model that aims to handle:
- stronger instruction-following (especially complex constraints)
- consistent characters and objects across iterations
- practical editing workflows (replace/remove elements while preserving structure)
- higher-resolution output options for polished assets
In other words, it’s meant to feel less like “AI roulette” and more like a dependable creative tool you can iterate with.
To get started, head to the model page: Seedream 5.0 AI Image Editor.
Note: On some platforms, availability can roll out gradually. If you see “Coming Soon,” you can still follow this guide because the workflow and prompting principles stay the same.
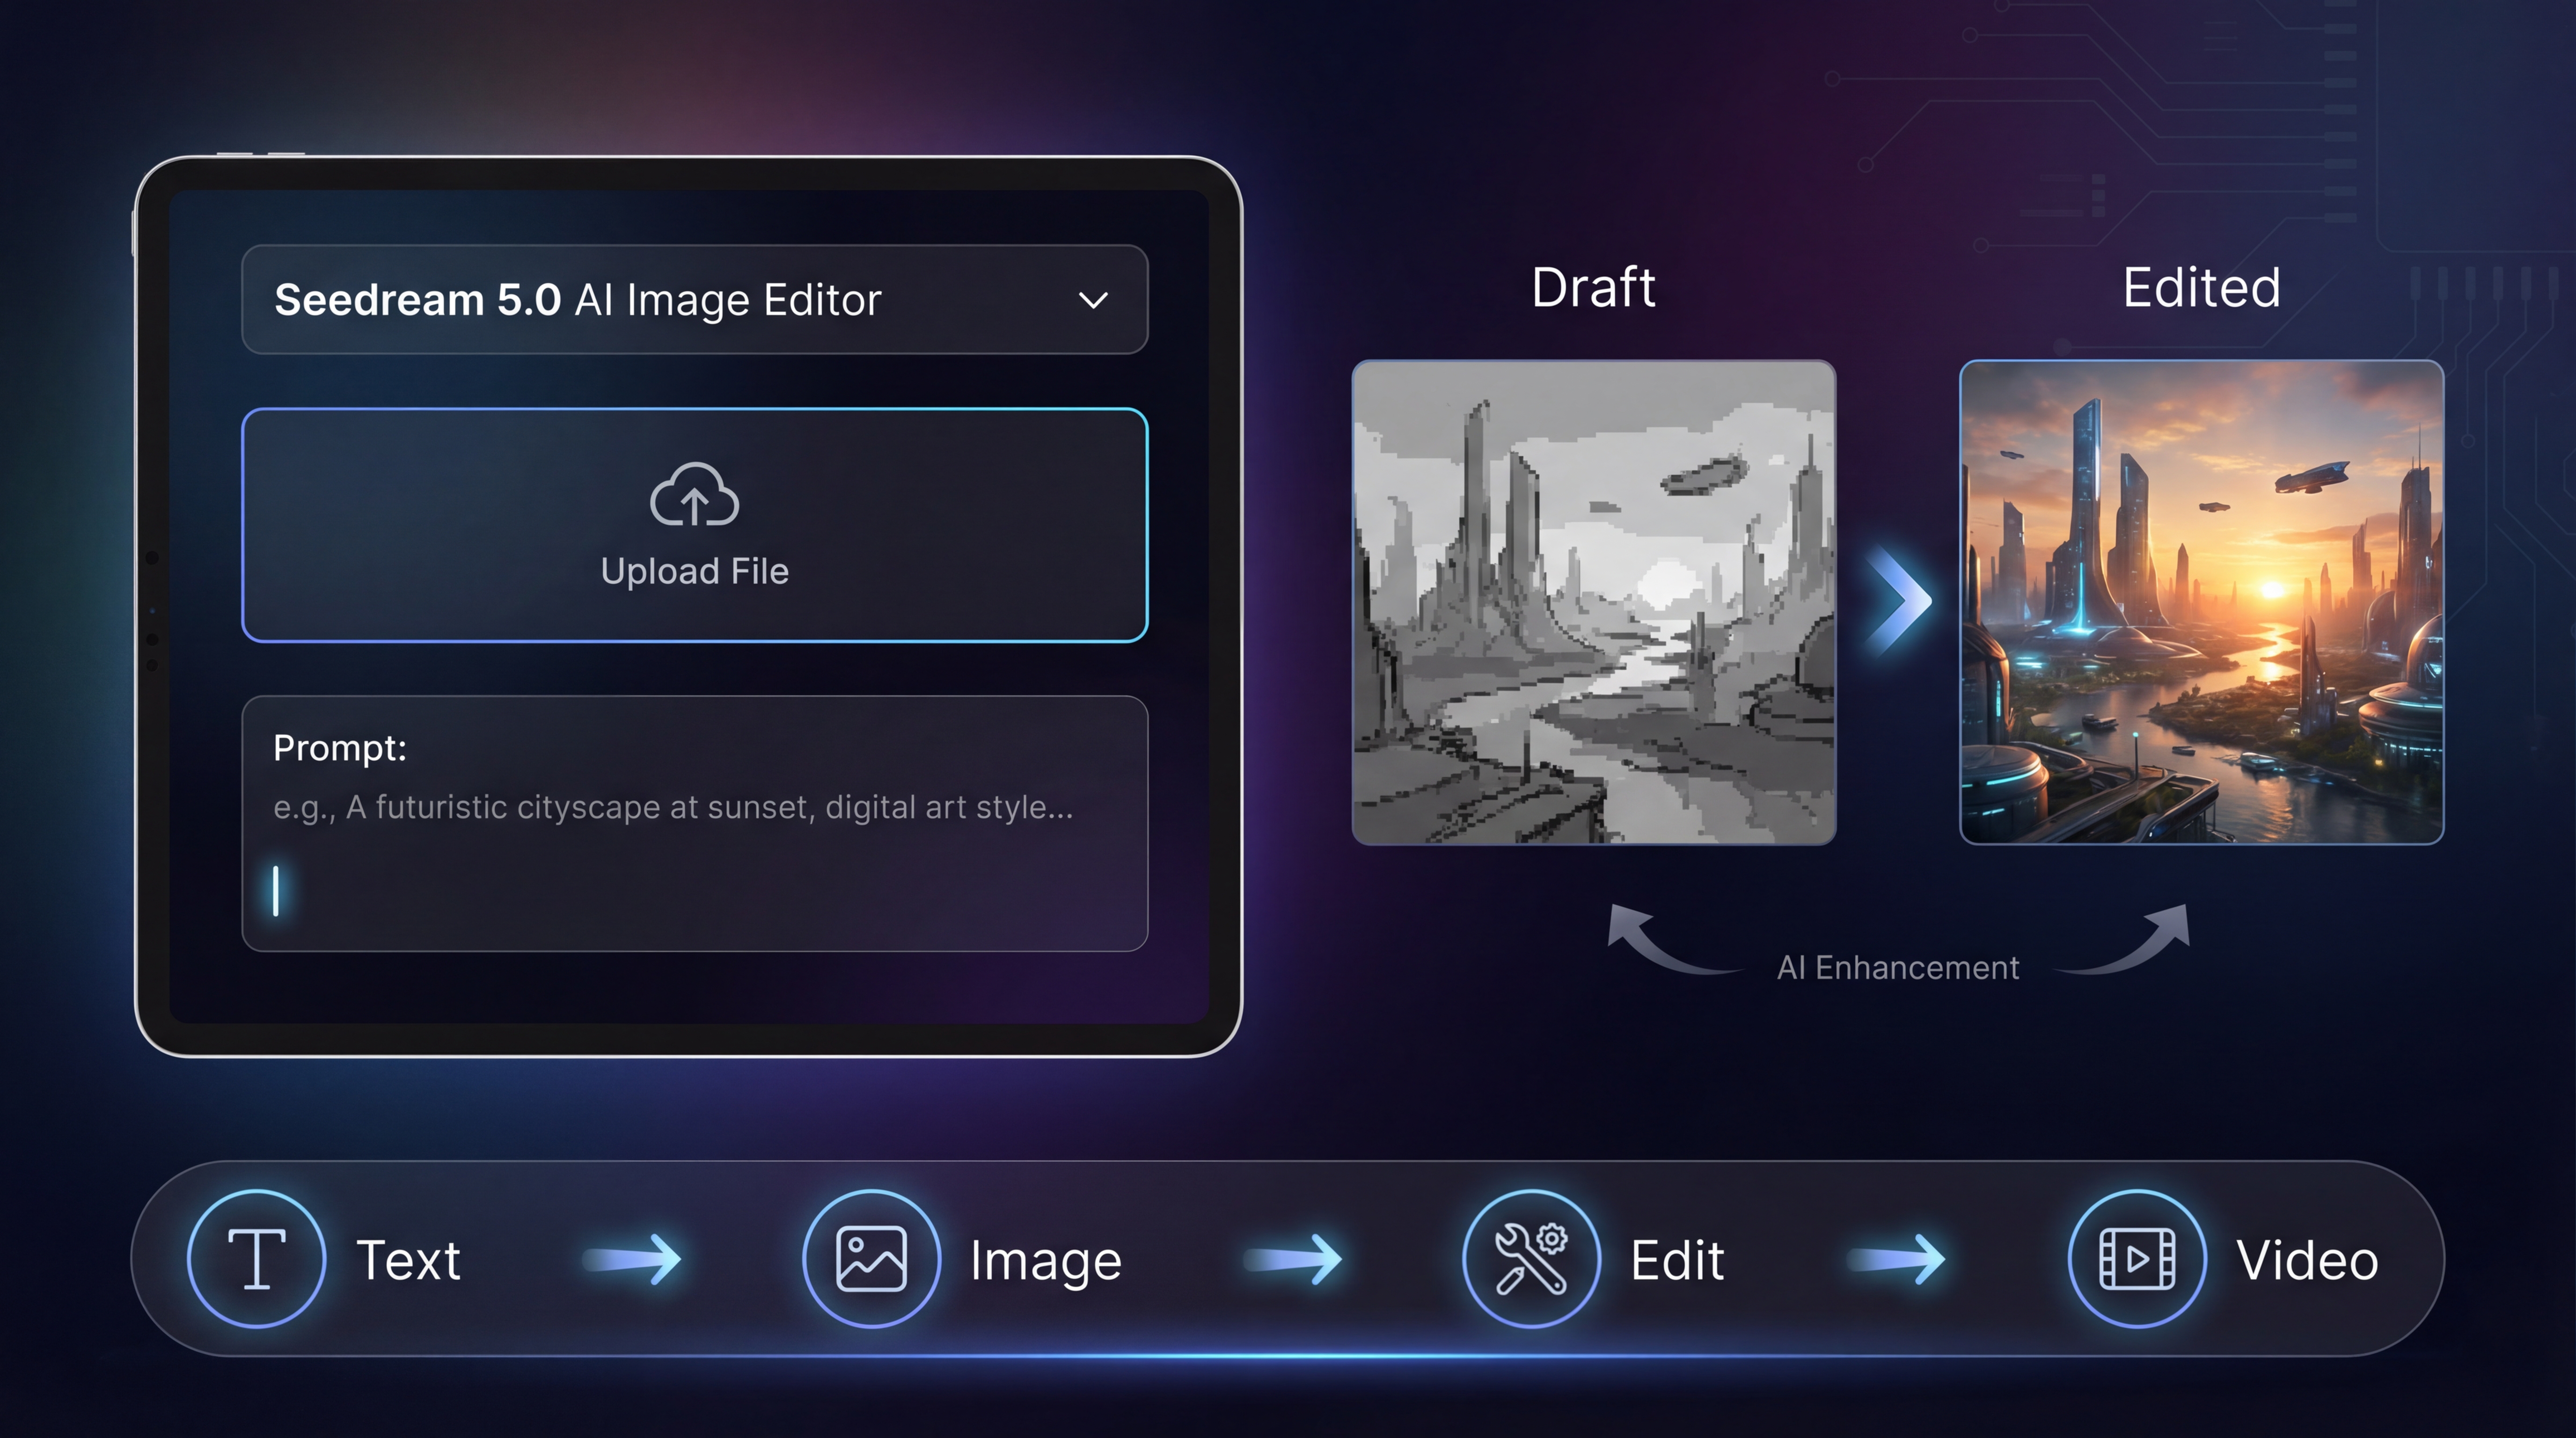
Quick UI walkthrough (so you don’t get stuck)
On the Seedream 5.0 model page, the interface is designed to be simple:
- Select Model: choose Seedream 5.0 (or compare with other models).
- Upload Images: drag-and-drop JPG/PNG references (helpful for image-to-image).
- Enter Prompt: write your instructions (up to 2000 characters).
- Aspect Ratio: choose your output format (1:1, 16:9, 9:16, etc.).
- Resolution: pick a quality level (draft vs final).
- Public toggle: decide whether your generation is visible.
If you’re new, don’t overthink settings. Your biggest quality gains will come from a good prompt structure and a clean edit workflow.
Step-by-step: Your first Seedream 5.0 text-to-image
Text-to-image is perfect when you’re creating something from scratch: a concept illustration, a poster background, a character portrait, or a product scene.
Step 1: Start with a “creative brief,” not a pile of adjectives
Instead of starting with “beautiful, stunning, cinematic,” start with purpose:
- What is the image for?
- Where will it be used?
- What must be visible?
Example:
“A clean e-commerce hero image for a skincare bottle on a minimal background…”
Step 2: Add non-negotiable constraints
Constraints are the part the model can’t guess:
- composition: “centered subject, clean negative space at the top”
- lighting: “soft studio softbox, subtle shadow”
- background: “smooth gradient, no texture”
- don’ts: “no watermark, no extra text, no hands”
Step 3: Generate a small batch before you edit
Your first generation is rarely “final.” Treat it like a draft. Generate a few variations, then pick the best composition.
Step 4: Save the best output as your base
Pick the version that’s closest in:
- composition
- lighting direction
- overall vibe
Then move to editing, instead of rerolling endlessly.
Step-by-step: Seedream image-to-image (the fastest way to stay consistent)
If you care about character consistency, product framing, or a stable layout, image-to-image is the shortcut that saves the most time.
Use image-to-image when you want:
- the same character across multiple outfits
- the same product shot with different backgrounds
- a consistent series style for a brand or campaign
How to do it
-
Upload 1–3 reference images in Seedream 5.0 AI Image Editor.
-
Write a prompt that clearly separates:
- what must stay the same (identity, pose, framing)
- what can change (background, lighting, style)
A simple pattern:
“Keep the subject identity and composition unchanged. Change only the background to … and lighting to …”
- Iterate in small steps.
If you want a dedicated workflow page for this style of transformation, you can also use HeyDream’s Image-to-Image Editor.
Seedream 5.0 image editing: How to get “change only one thing”
Most people waste credits by regenerating everything when they only need one fix.
A better mindset is: generate a good base, then edit surgically.
That’s what Seedream 5.0 image editing is for.
The best edit prompt structure
Use this sentence pattern:
Keep X the same. Change only Y. Do not change Z.
Examples you can copy:
- “Keep the subject identity, pose, and composition unchanged. Change only the lighting to soft studio softbox. Do not add text.”
- “Preserve the entire scene. Replace the mug on the table with a glass cup. Keep everything else identical.”
- “Keep the character’s face, hair, and outfit unchanged. Change only the background to a rainy neon street at night.”
When edits start drifting, it’s usually because the prompt didn’t explicitly lock the identity and composition.
Prompting that works (a simple framework)
Here’s a prompt format that consistently produces better results than “adjectives only.”
The 5-part prompt framework
- One-line concept (what it is)
- Non-negotiables (must/only/don’t)
- Visual controls (lighting, lens, composition)
- Style spec (realistic, illustration, 3D, editorial)
- Output constraints (no watermark, no extra text)
Quick examples
Product hero image
A premium e-commerce hero image of a skincare bottle, centered. Soft studio lighting, crisp edges, subtle shadow. Clean gradient background. Minimal composition. No hands, no watermark, no text.
Poster background
A modern abstract background for a tech event poster. Smooth gradient, soft geometric shapes, high-end minimal style. Leave plenty of negative space for text. No letters or typography.
Bonus shortcut: turn an image into a better prompt
If you already have an image you like, you can reverse-engineer a prompt using Free Image to Prompt. This is a great way to learn how the model describes lighting, camera angle, and style.
Quality controls people actually use
Aspect ratio: pick it based on where you’ll publish
- 1:1: social feeds, marketplaces
- 9:16: shorts/reels covers
- 16:9: banners, YouTube thumbnails, hero headers
If you choose the right aspect ratio upfront, you’ll save time later because you won’t need to crop away important details.
Resolution: draft first, then polish
A practical workflow:
- draft at a lower quality while you’re deciding direction
- switch to higher resolution only when your composition is locked
That way you don’t spend your best settings on images you’re going to throw away.
Common issues and quick fixes
“My subject keeps changing across versions.”
Fix:
- switch to image-to-image
- lock identity: “preserve face, hair, outfit, camera angle”
- keep edits small
“The layout is messy.”
Fix:
- reduce clutter: “one focal subject, minimal background”
- explicitly request negative space
- avoid adding too many objects at once
“Text looks wrong.”
Fix:
- keep text short
- specify exact text in quotes
- generate multiple tries
- consider adding text later in a design tool if it must be perfect
“My background is distracting.”
Fix:
- generate a clean subject first
- remove the background with Free Background Remover
- then regenerate or composite onto a cleaner background
Cost + speed tips (so you don’t burn credits)
A simple credit-saving habit:
- Explore with small batches.
- Pick a base that’s close.
- Edit instead of regenerating.
- Polish only when you’re confident.
That pattern almost always costs less than rerolling 20 times trying to “luck into” the perfect output.
What to generate first (easy wins)
If you want quick results that build confidence, try:
- product hero images with clean backgrounds
- character portraits with a consistent style
- poster backgrounds with strong negative space
- simple ad creatives that emphasize one clear subject
Once you can reliably generate these, you’ll have an easier time scaling up to complex multi-subject scenes.
Recommended HeyDream AI tools to pair with Seedream 5.0
Seedream is the core image model—but your workflow gets faster when you pair it with the right supporting tools.
Use these tools when you want to move from image → finished content
- AI Image Generator: great for quick drafts and comparing multiple models.
- Text to Image: a dedicated flow when you’re creating from scratch.
- Image-to-Image Editor: the fastest way to keep identity and layout consistent.
- Image to Video: animate your best still into motion for reels/shorts.
- Text to Video: create video content when you don’t have a base image.
- AI Product to Video: turn product images into quick ad-style clips.
- Image to 3D: convert a still into a usable 3D asset.
A simple “publishable content” pipeline
If you want a repeatable workflow:
- Generate your best still with Seedream 5.0 AI Image Editor
- Improve consistency with HeyDream’s Image-to-Image Editor
- Clean the cutout using Free Background Remover
- Animate it with Image to Video
- Turn product shots into ads with AI Product to Video
Final takeaway
If you treat Seedream like a single-shot generator, you’ll always feel like you’re gambling with prompts.
If you treat it like a workflow tool—draft → edit → polish—you’ll get consistent results much faster.
Start with Seedream 5.0 AI Image Editor for your base generations, then use HeyDream’s supporting tools to lock consistency, clean backgrounds, and turn your images into video-ready content.