Vidu Q3 video creation is most useful when you want a short AI video that feels planned: a clear subject, a controlled scene, camera movement, and audio direction that supports the story. On HeyDream AI, the practical starting point is the Vidu Q3 AI Video Generator, then choosing the workflow that matches your input: text prompt, start-frame image, product asset, or a broader AI video generator workspace.

This guide explains how creators, marketers, TikTok/Reels users, product advertisers, short-film makers, and AI video beginners can use a Vidu Q3 AI video with audio workflow. It covers when to use Image to Video AI, when to use Text to Video AI, how to write prompts, how to plan sound, and how to turn one image into a more complete short video.
Quick summary: start with the goal, choose the input type, write a scene prompt, add audio direction, generate variations, and review the output before publishing. Before using the result commercially or in paid campaigns, verify the current HeyDream settings for duration, resolution, credit cost, free-trial access, commercial rights, audio support, watermark rules, and export limits.
Vidu Q3 Video Creation Guide: What to Build First on HeyDream AI
The best Vidu Q3 AI Video Generator workflow starts with a specific video job, not with a vague prompt. Vidu Q3 is a good fit for short narrative clips, image-driven video, product demos, social posts, ad drafts, motion comics, and creator workflows that need synchronized sound. If you know the final use case before prompting, the model has a clearer direction and your review process becomes easier.
Use HeyDream's Vidu Q3 model page as the main access point when your article, workflow, or tutorial is specifically about Vidu Q3. Use the broader AI Video Generator when the reader needs a general video creation workspace, model choice, or a mixed text-and-image workflow.
A practical planning card looks like this:
- Goal: TikTok ad, Reels post, product clip, short-film scene, motion comic, real estate clip, or YouTube Shorts intro.
- Input: text only, one reference image, product photo, character image, or scene still.
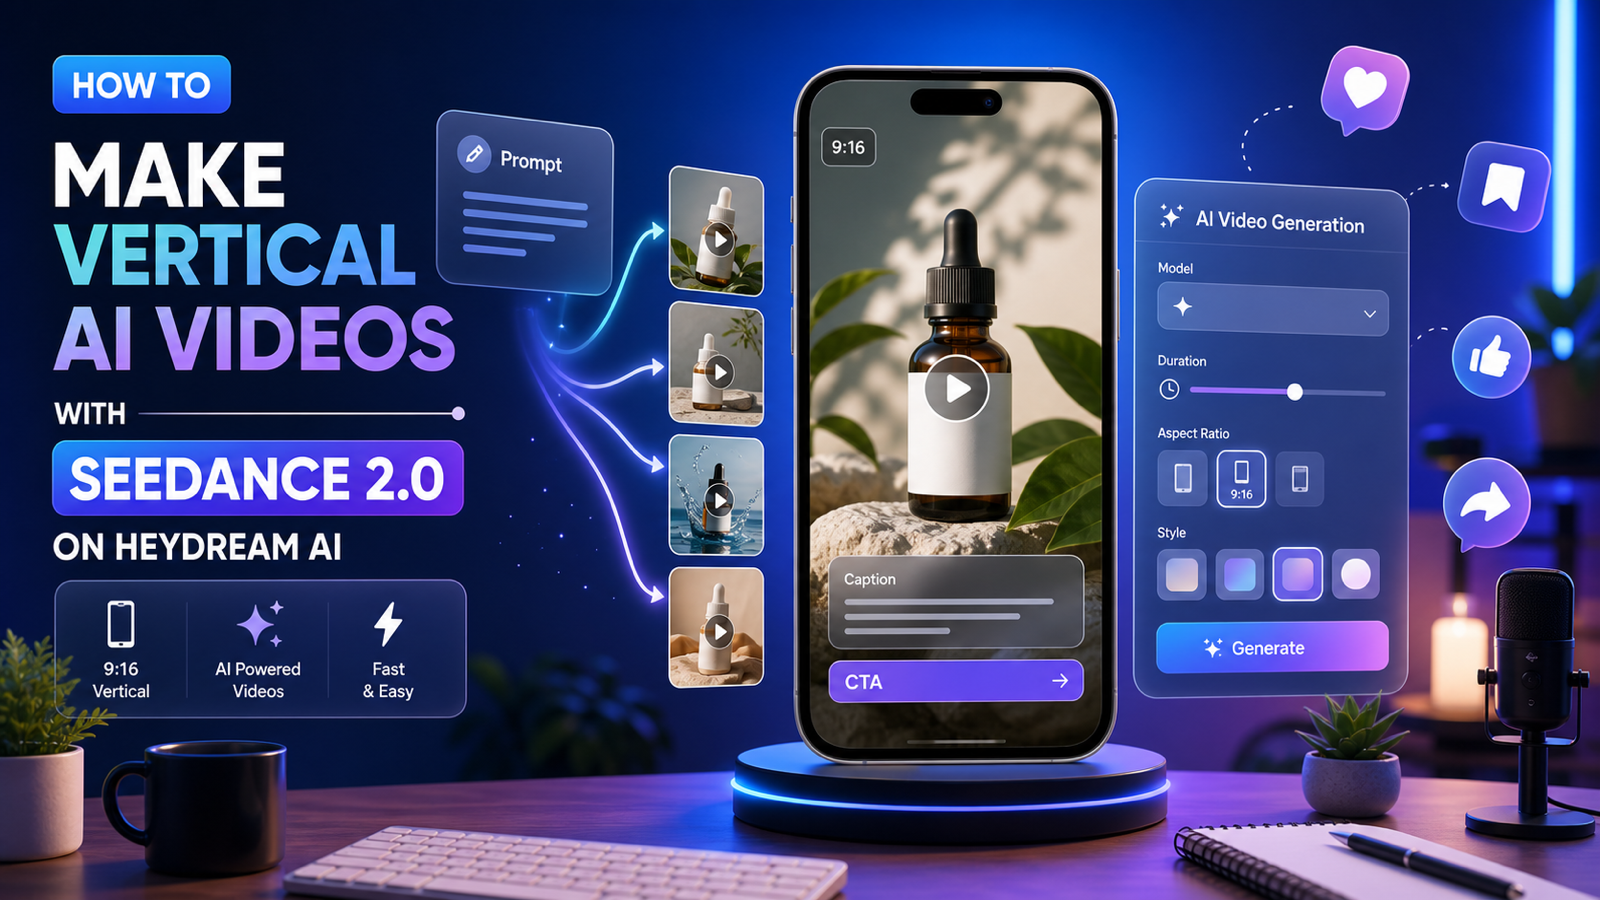
- Format: 9:16 for TikTok/Reels/Shorts, 16:9 for YouTube and cinematic previews, 1:1 for square social posts, or 4:5 for feed-friendly fashion and product clips.
- Motion: push-in, side-pan, orbit, handheld close-up, tracking shot, or slow pullback.
- Audio: music, ambient sound, dialogue, voiceover, sound effect, or soundtrack cue.
- Review: subject consistency, hand motion, text accuracy, audio timing, brand safety, and export rules.
This simple card prevents the most common beginner mistake: asking for a beautiful video without defining the shot, sound, or platform.

When to Use Image to Video AI with Vidu Q3 Instead of Text to Video AI
Use image to video when visual consistency matters more than pure imagination. A start-frame image gives the model a stronger anchor for the subject, product, room, character, clothing, lighting, and composition. That makes Image to Video AI especially useful for product clips, fashion lookbooks, real estate walkthroughs, food promos, creator thumbnails, and cinematic scene extensions.
Choose text to video when the idea begins as a script, scene description, or concept. The Text to Video AI workflow is better when you do not already have a usable image, or when you want to explore several visual directions quickly before committing to a specific look.
In practice, the decision is simple:
- Use image to video AI with Vidu Q3 when you need to turn one image into AI video while preserving the main subject.
- Use text to video AI when you need to create AI video from text prompt ideas, scripts, and story beats.
- Use the general AI video generator when you want a flexible workspace for text prompts, image prompts, model selection, and output testing.
- Use AI Product to Video Generator when the reader's goal is ecommerce content, product ads, UGC-style demos, or a product-first workflow.
For a start-frame AI video workflow, keep the first prompt narrow. Ask for one main action, one camera move, and one audio direction. For example, a still image of a perfume bottle can become a slow push-in with soft mist, a subtle glass sparkle sound, and a final frame with space for captions. If the first result keeps the product stable, add more motion in the next variation.

Vidu Q3 Prompt Guide for Creators Who Need Audio and Better Scene Control
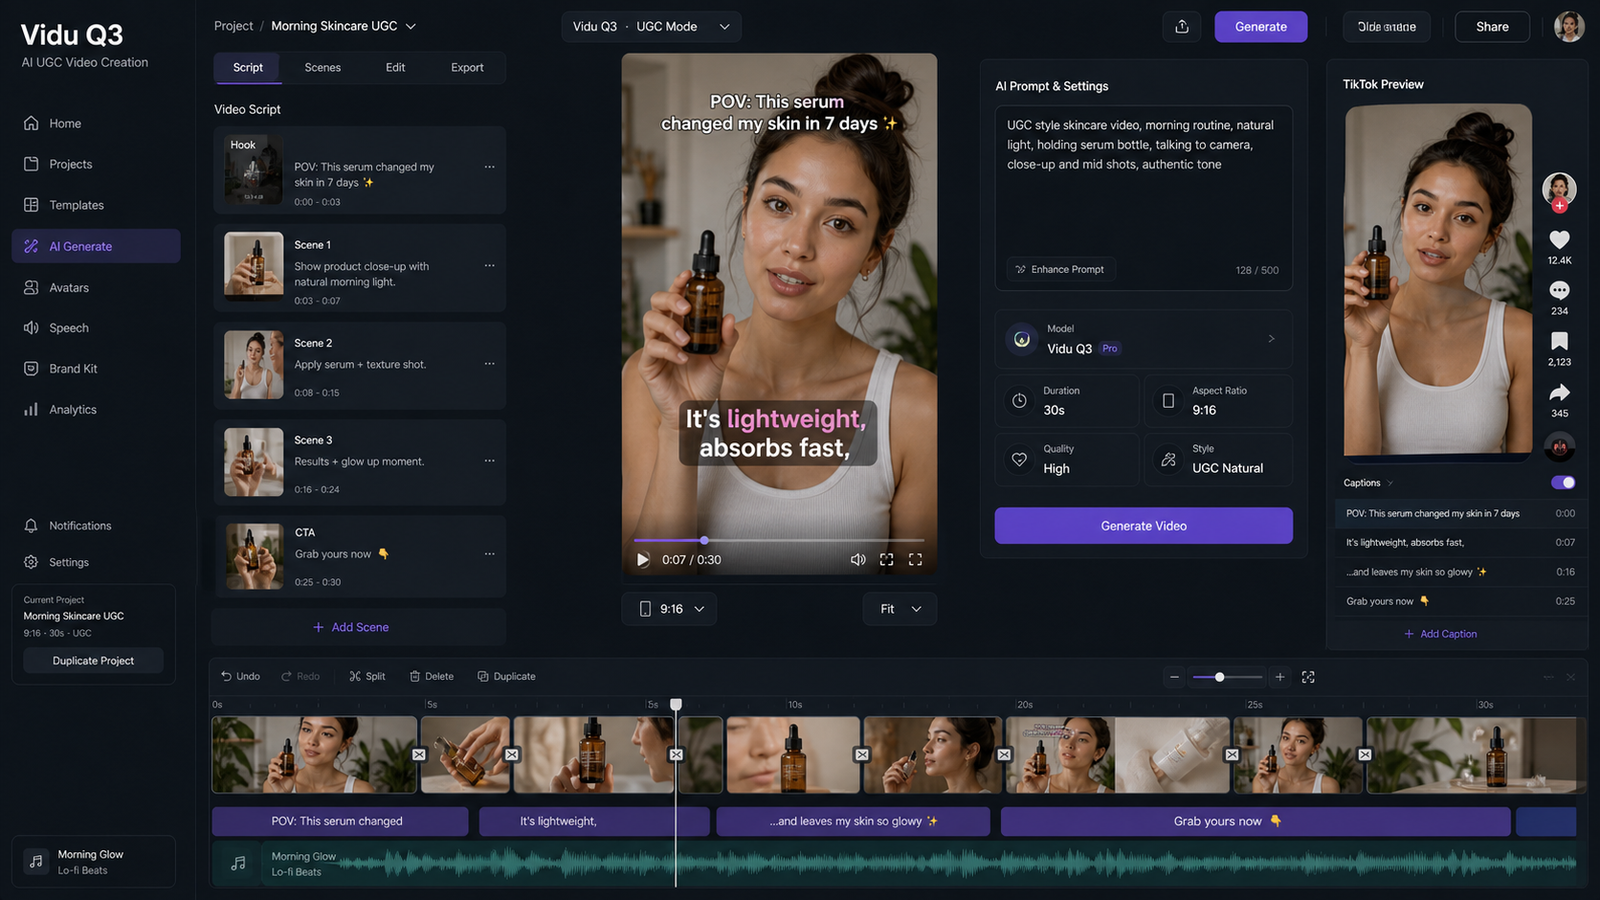
A good Vidu Q3 prompt describes the clip as a directed scene. It should tell the model what appears, what changes, how the camera moves, what sound supports the action, and what to avoid. This matters more when the video includes audio because soundtrack, movement, and timing need to feel connected.
Use this reusable prompt formula:
Create a [duration] AI video of [subject] in [scene]. The subject should [main action] while [secondary motion/environment detail]. Camera: [camera movement]. Lighting: [lighting]. Mood: [mood]. Audio: [music/sound/dialogue/ambient sound]. Style: [cinematic/product/UGC/anime/realistic]. Ratio: [9:16/16:9/1:1]. Avoid [visual issues, logos, distorted anatomy, unreadable text].
Copy-to-use prompt examples:
- Create a 16-second cinematic product video of a luxury perfume bottle on a marble table. The bottle slowly rotates while soft mist moves across the surface. Camera: slow push-in with shallow depth of field. Lighting: warm golden studio light. Mood: elegant and premium. Audio: soft ambient luxury music with subtle glass sparkle sounds. Style: photorealistic product commercial. Ratio: 9:16. Avoid fake logos and unreadable text.
- Create a 12-second TikTok-style UGC ad showing a creator picking up a skincare serum in a bright bedroom. The creator smiles, applies the product, and points to the bottle. Camera: handheld phone-style close-up. Lighting: natural morning window light. Mood: casual, trustworthy, native to the feed. Audio: upbeat soft pop background with light room ambience. Ratio: 9:16. Avoid over-polished commercial acting.
- Create a 15-second cinematic streetwear video from a reference image of a model. The model walks through a rainy neon street, jacket moving in the wind, reflections on the pavement. Camera: slow tracking shot from waist level. Lighting: neon blue and pink city lights. Mood: stylish and dramatic. Audio: low electronic beat with rain ambience. Ratio: 9:16. Avoid distorted hands or changing clothing design.
- Create a 10-second food promo video of a burger on a wooden table. Steam rises from the patty, cheese melts slightly, and the camera circles slowly around the product. Lighting: warm restaurant lighting. Mood: appetizing and energetic. Audio: subtle sizzling sound and upbeat background music. Style: photorealistic food commercial. Ratio: 1:1. Avoid messy background and fake brand text.
- Create a 16-second motion comic scene of a lone explorer standing before a glowing ancient gate. The explorer raises a lantern, dust moves in the air, and the gate slowly lights up. Camera: wide shot to medium close-up. Lighting: dramatic blue-gold fantasy lighting. Mood: mysterious and adventurous. Audio: cinematic drums, low choir, and stone rumble. Ratio: 16:9. Avoid copyrighted characters.
- Create a 12-second real estate video from a clean living room image. The camera glides from the sofa toward the window, sunlight shifts gently across the room, curtains move slightly. Lighting: bright natural daylight. Mood: calm, premium, welcoming. Audio: soft piano and subtle room ambience. Ratio: 16:9. Avoid warped furniture and unrealistic architecture.
- Create a 15-second YouTube Shorts intro of a tech creator placing a smartphone on a desk. The phone screen glows, icons animate subtly, and the creator's hand enters frame naturally. Camera: top-down to angled close-up. Lighting: cool studio light. Mood: modern and informative. Audio: clean tech beat with soft notification sounds. Ratio: 9:16. Avoid real app logos and unreadable screen text.
- Create a 16-second travel video from a single image of a mountain lake. The water ripples, clouds drift, sunlight breaks through the mountains, and a person walks along the shore. Camera: slow drone-like pullback. Lighting: sunrise glow. Mood: peaceful and cinematic. Audio: gentle wind, birds, and soft orchestral music. Ratio: 16:9. Avoid unrealistic water motion.
- Create a 10-second fashion lookbook clip of a model turning slightly in a studio. Fabric texture stays consistent, hair moves naturally, and the pose changes slowly. Camera: medium shot with slight dolly movement. Lighting: softbox editorial lighting. Mood: clean and high-fashion. Audio: minimal runway beat. Ratio: 4:5. Avoid face distortion and clothing changes.
- Create a 12-second product demo video of a smart desk lamp turning on in a modern workspace. The lamp brightness increases, keyboard lights glow, and a notebook is visible beside it. Camera: slow side-pan. Lighting: cozy evening desk light. Mood: productive and modern. Audio: subtle click, soft electronic ambience. Ratio: 16:9. Avoid fake UI text and clutter.
For better scene control, change one variable at a time. Keep the same subject and ratio, then test camera movement, audio direction, or lighting in separate versions. This makes the Vidu Q3 prompt guide for creators easier to apply because you can compare what actually changed.

AI Video Generator Workflows for Social Media, Product Videos, and Short Cinematic Scenes
HeyDream works best as a practical platform recommendation when the article connects each tool page to a real creator workflow. Readers are usually not just asking "what is Vidu Q3?" They want to know which page to open and what to make first.
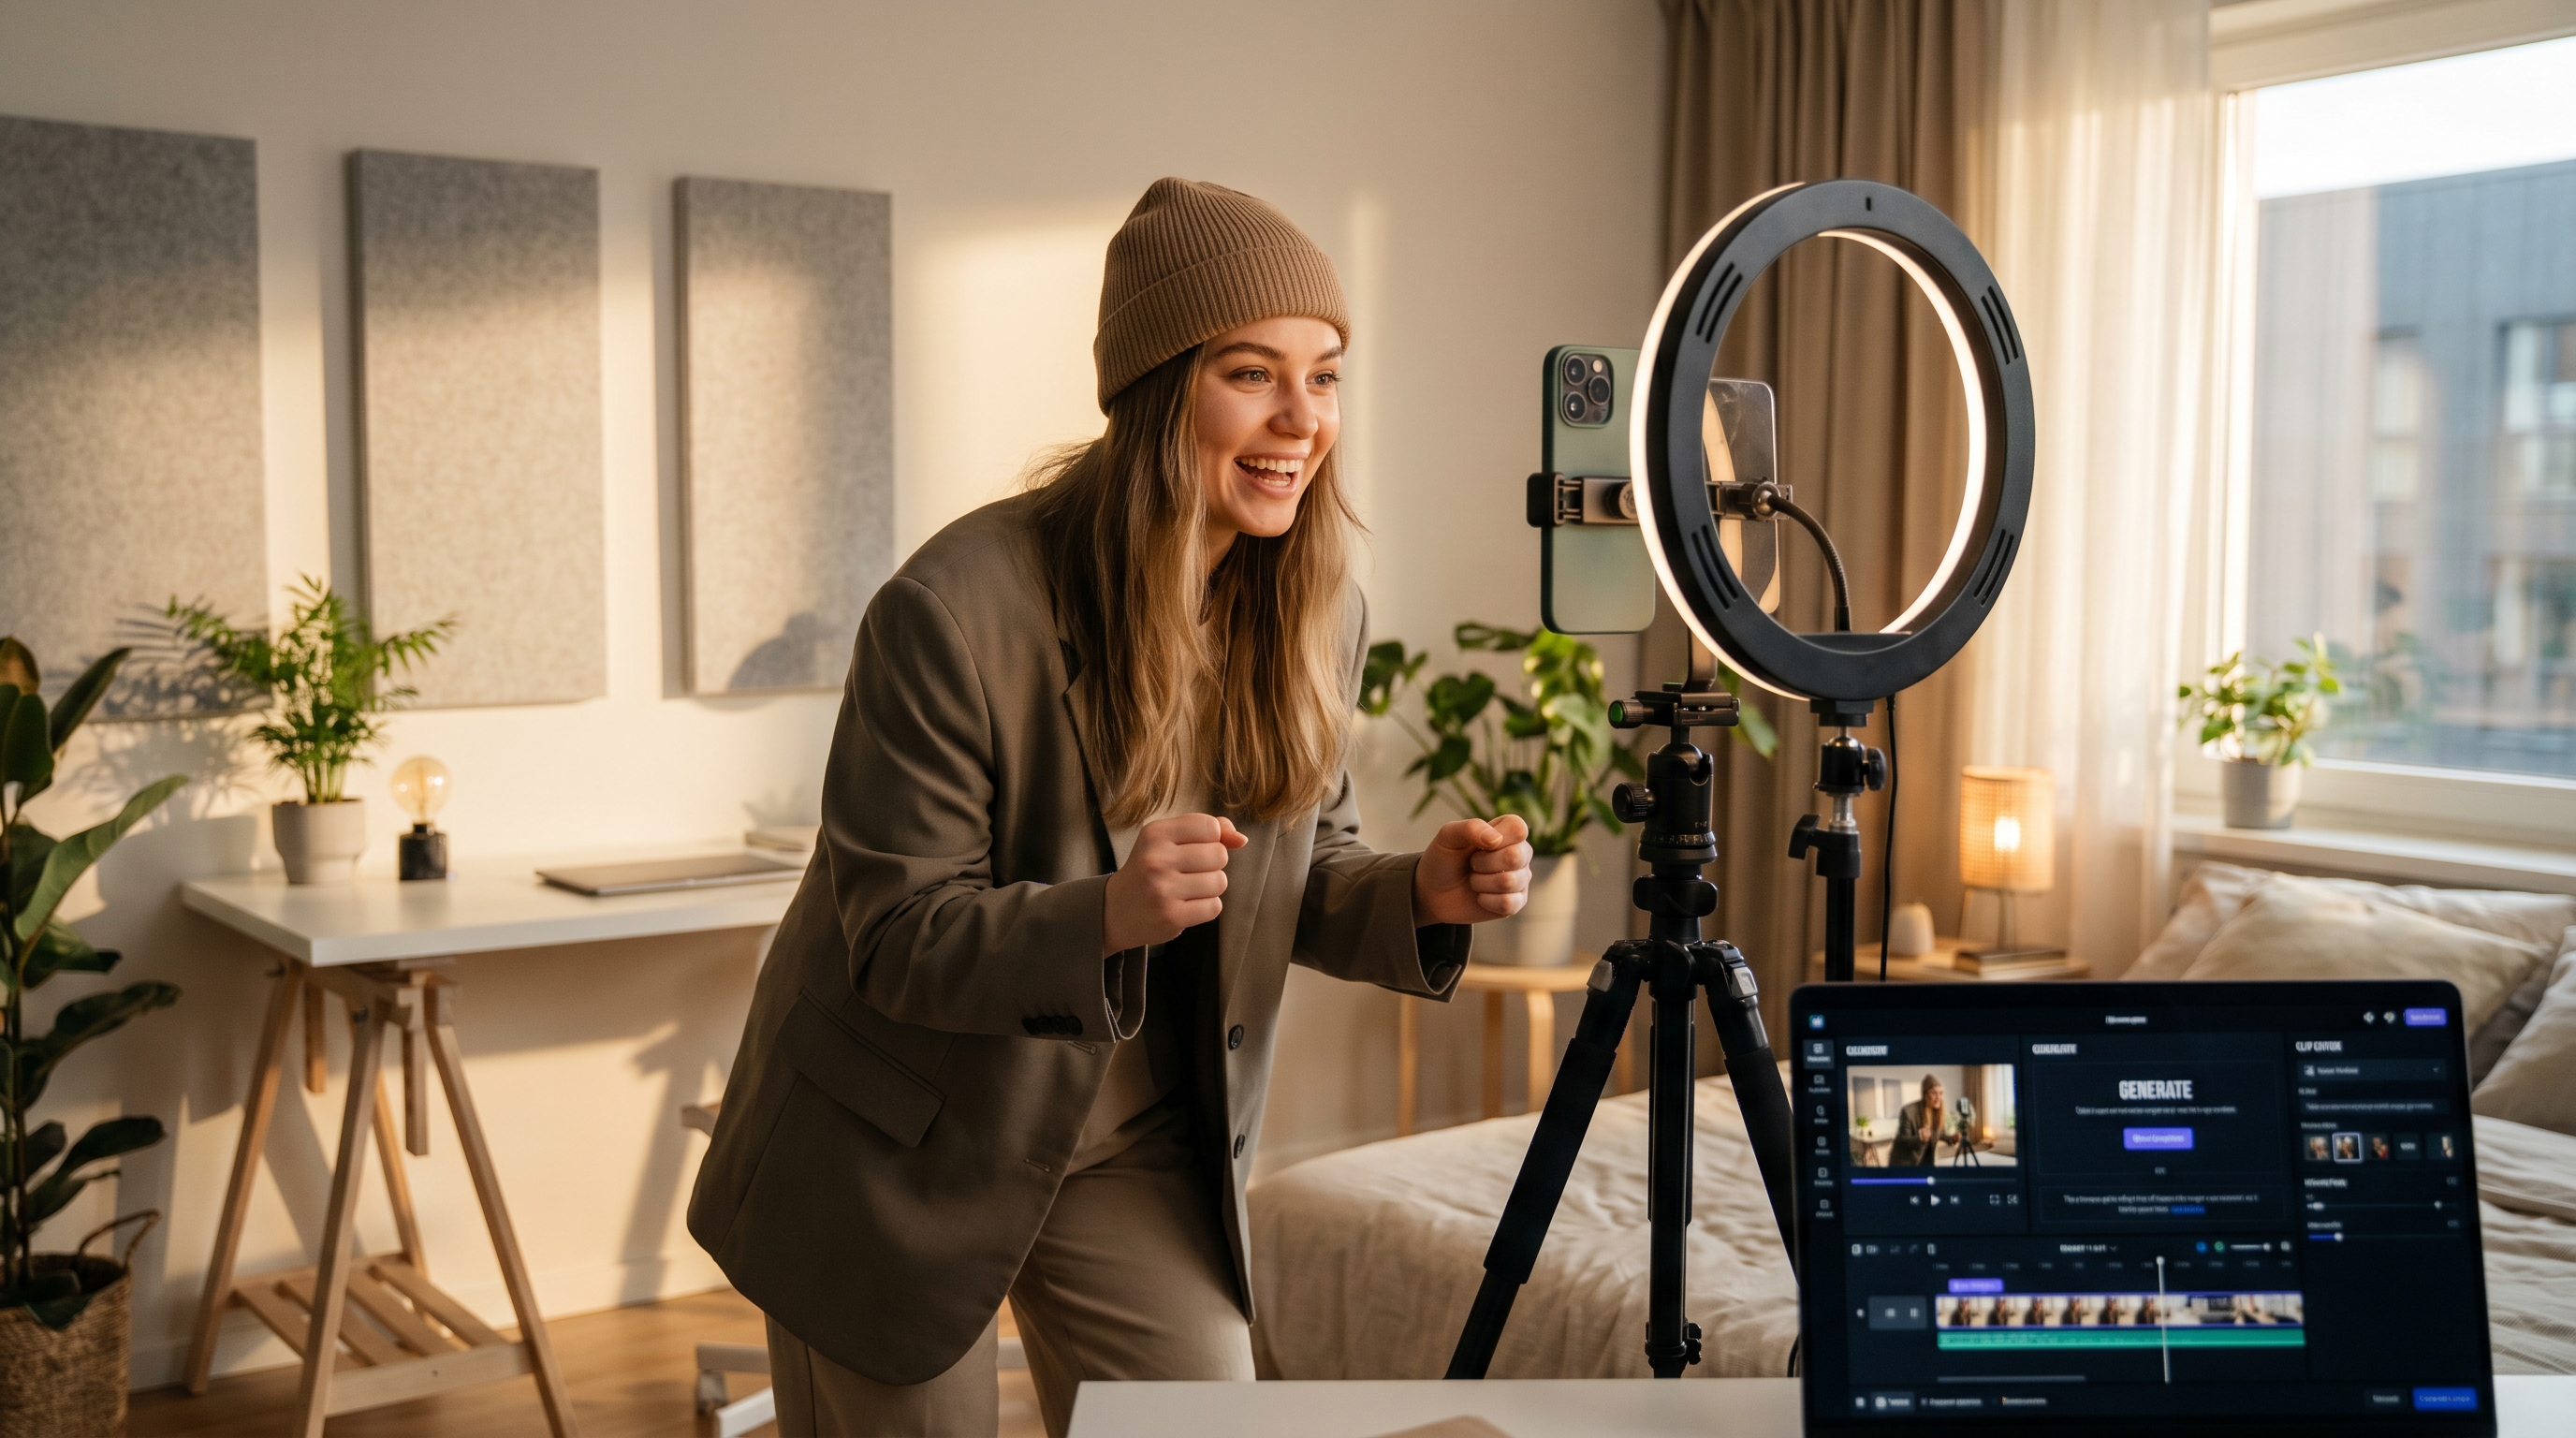
For social media videos, start with the AI Video Generator or Vidu Q3 model page and design the clip around a platform format. TikTok, Reels, and Shorts usually need a fast opening, vertical framing, obvious subject motion, and audio that supports the hook. A 9:16 creator-style prompt works better than a generic cinematic prompt if the final clip needs to feel native to the feed.
For product videos, begin with a clean product image and use AI Product to Video Generator or an image-to-video workflow. Product clips need stability more than visual chaos. Ask for a close-up, product rotation, surface detail, hand interaction, packaging reveal, or simple lifestyle context. Avoid fake logos, unreadable text, exaggerated claims, and product changes that would mislead a buyer.
For short cinematic scenes, use Vidu Q3 as a scene generator rather than a full film tool. A strong short-film prompt has a subject, setting, action beat, camera move, lighting, mood, and sound cue. Motion comics, fantasy gates, rainy streetwear walks, travel pullbacks, and mini narrative moments are realistic targets for short drafts. Longer story continuity still needs human planning and editing.
For a more reliable output, review each draft against five checks:
- Does the first frame make the subject clear?
- Does the camera movement match the platform and mood?
- Does the audio direction support the action instead of distracting from it?
- Does the subject stay visually consistent?
- Are any claims, logos, people, or product details risky to publish?
That review step is what turns an AI video generator with text and image prompts into a repeatable creator workflow.

Publishing Checklist, FAQ, and Conclusion for Vidu Q3 on HeyDream AI
Before publishing, treat every Vidu Q3 output as a draft that needs review. This is especially important for product advertisers and social media teams because viewers may interpret the clip as a real demonstration, testimonial, or brand-approved ad. Check the live HeyDream interface and terms before relying on duration, resolution, credit cost, free-trial access, commercial rights, audio support, watermark rules, or export limits.
Use this quick publishing checklist:
- Verify model availability on the Vidu Q3 page before promising the workflow to readers or clients.
- Confirm supported duration, resolution, aspect ratios, audio options, export formats, and credit cost in the live interface.
- Check watermark rules, free-trial restrictions, and usage rights before using clips in paid or commercial contexts.
- Review product accuracy, hands, faces, object interactions, captions, fake text, and scene continuity.
- Remove unsupported commercial claims, medical/beauty claims, celebrity likenesses, copyrighted characters, and real brand logos unless permission is clear.
- Edit the final output with captions, final CTA, music rights, platform-safe copy, and brand review.
FAQ
What is the best way to start a Vidu Q3 image to video workflow?
Start with one clean image, one main action, one camera movement, and one audio direction. After the subject stays stable, test more ambitious movement, captions, or scene changes.
Is Vidu Q3 better for image to video AI or text to video AI?
Use image to video AI when you need visual control over a product, person, room, or style. Use text to video AI when you are exploring a new scene from a written prompt and do not need a specific start frame.
Can Vidu Q3 create AI video with audio?
The article brief positions Vidu Q3 around AI video with audio, but publishers should verify current audio support, sync behavior, available settings, and export limits on HeyDream before making a hard feature claim.
Can I use Vidu Q3 for product videos and ads?
Yes, Vidu Q3 can be a useful drafting workflow for product clips, product demos, UGC-style ads, and social posts. Before publishing, check product accuracy, rights, claims, platform policies, watermark rules, and commercial-use terms.
What should I avoid in Vidu Q3 prompts?
Avoid vague scenes, too many actions in one short clip, real brand logos, copyrighted characters, celebrity faces, tiny text, unsupported claims, and prompts that imply a real testimonial when no real person gave one.
Conclusion
Vidu Q3 video creation guide workflows are strongest when you plan the clip before you prompt it. On HeyDream AI, use the Vidu Q3 AI Video Generator for model-specific access, the AI Video Generator for broader creation, Image to Video AI for start-frame control, Text to Video AI for prompt-only scenes, and AI Product to Video Generator for product-first clips. The best next step is simple: choose one use case, write one focused prompt, generate a few variations, and review every output before publishing.