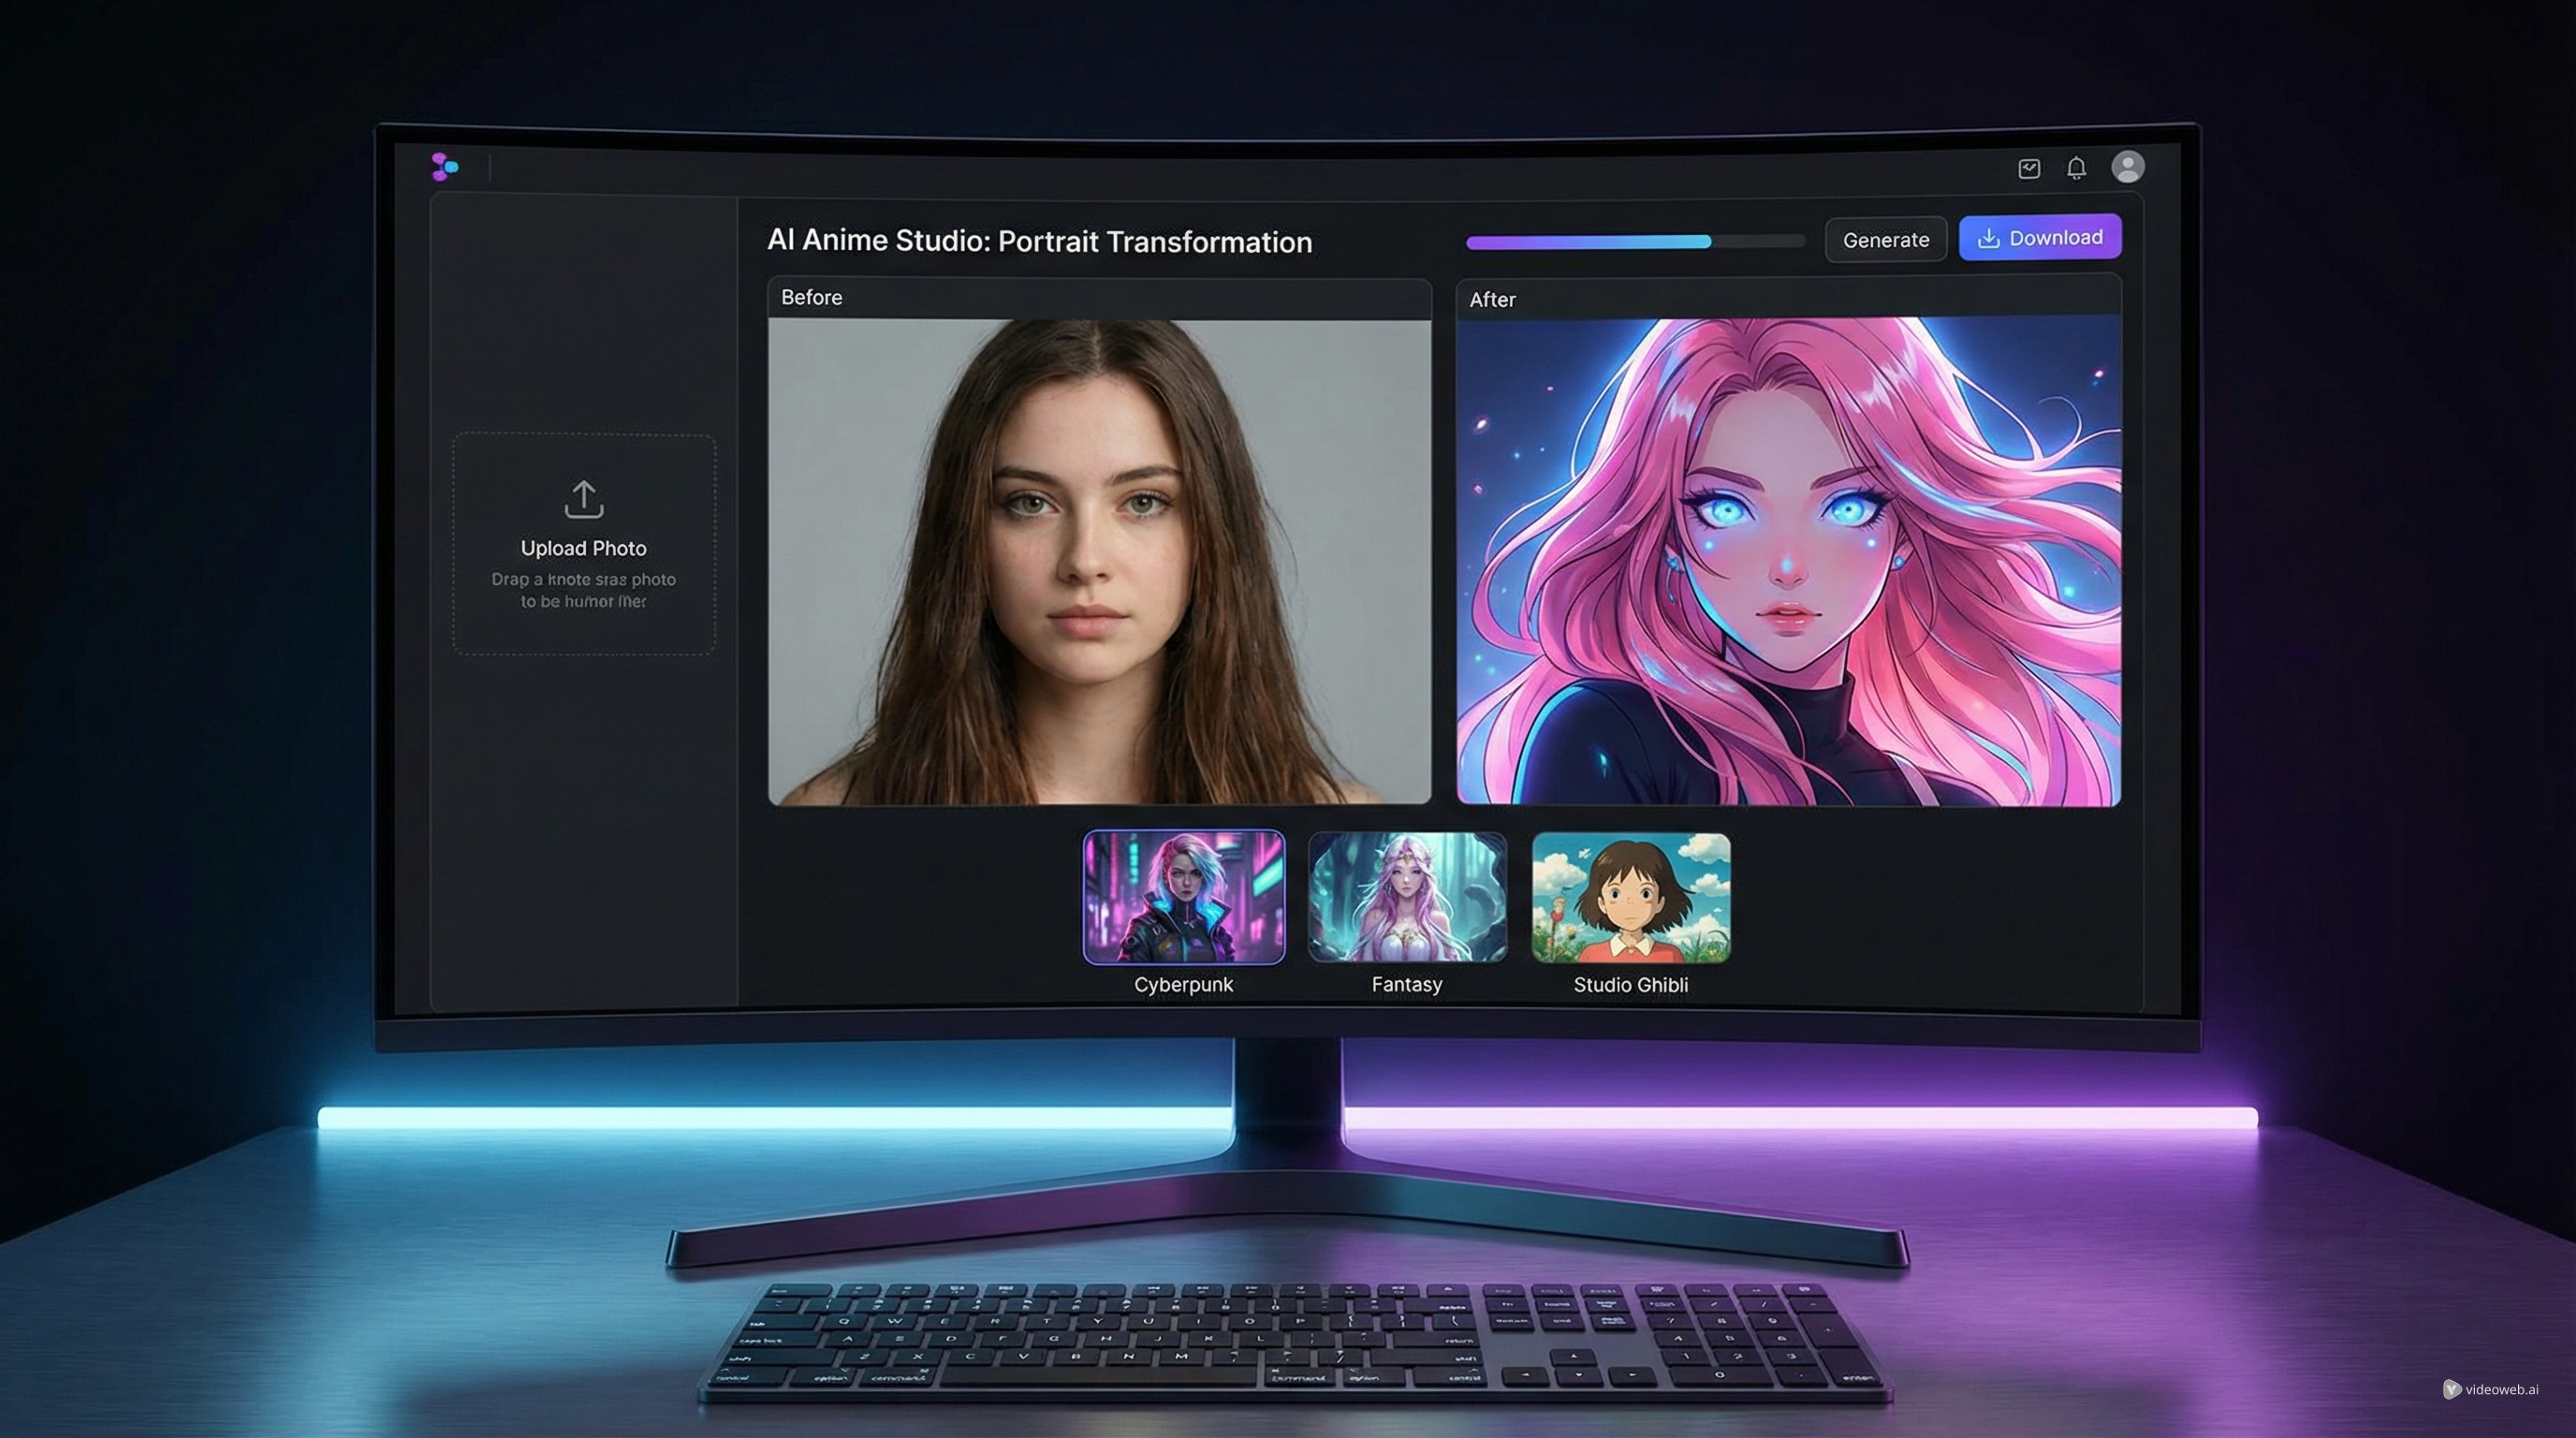
Anime-style portraits are popular for a reason. They feel expressive, polished, and instantly recognizable, but they also let ordinary photos become something more stylized and personal. If you want a fast way to convert photo to anime style without learning illustration software or spending hours prompting from scratch, HeyDream AI offers a simple workflow built for exactly that.
Its Photo to Anime tool is designed to help users upload a normal image, choose a visual direction, add a prompt, and generate a finished anime-inspired version in just a few steps. Whether you want a cute avatar, a manga-like portrait, a fantasy-style character look, or a polished social media profile image, the process is beginner-friendly while still giving you some creative control.
Why photo-to-anime tools are so appealing
There are many ways to stylize an image, but anime conversion stands out because it balances familiarity and transformation. The face still looks like the original subject, yet the final result feels cleaner, more cinematic, and more expressive than a standard photo. That is why so many people use this kind of tool for profile pictures, gift art, fan edits, personal branding, and social content.
When you convert image to anime style well, the result should not just look cartoonish. It should preserve the identity of the person while translating the image into a visual language that feels intentional. The best anime-style outputs usually keep recognizable facial structure, hair shape, and mood, while improving color harmony, texture, and overall atmosphere.
That is also why the source image matters. A good transformation starts with a photo that gives the model enough visual clarity to work with.
Start with a better source image
If you want stronger results, begin with a photo that is clear, well-lit, and easy to read. The cleaner your input, the easier it is for the system to interpret facial features, hair, clothing, and background relationships.
A front-facing or slightly angled portrait usually works best. Try to avoid photos that are too dark, heavily filtered, blurry, or crowded with distracting objects. If the subject is too small in the frame, the anime conversion may lose detail or make the face feel less consistent.
A few practical choices can improve the result right away:
- Use a high-resolution image if possible.
- Keep the face visible and unobstructed.
- Choose a simple or visually clean background.
- Avoid extreme shadows across the eyes or mouth.
- Pick a photo with a clear emotional tone.
For example, if you want to convert photo to anime style for an avatar, a centered portrait with balanced lighting is usually the safest starting point. If you are aiming for a dramatic fantasy look, you can still begin with a clean image and let the style template do the heavier visual lifting.
Choose the right template before you generate
One of the most useful parts of the HeyDream AI interface is the style template section. Instead of forcing you to build every look from scratch, it offers visual directions such as Chibi, Ghibli-inspired, Japanese anime, Pixel, Manga, Jojo, 3D Anime, Fantasy, and Cyberpunk. That makes it much easier to decide what kind of transformation you want before you generate.
Each template changes the mood of the image in a different way. Chibi pushes the output toward cute proportions and a playful tone. Manga tends to create a more illustrated, graphic look. Fantasy often adds a softer cinematic finish, while Cyberpunk usually leans into stronger lighting and bolder color contrast.
This is where the tool becomes more than a one-click filter. When you convert image to anime style, the template is effectively helping define the final character of the portrait. A realistic selfie can become sweet, dramatic, nostalgic, or futuristic depending on the visual direction you choose.
If you are unsure where to begin, start with the template closest to your goal instead of the most extreme one. It is easier to push style further on a second attempt than to recover an image that has gone too far from the subject.
Use prompts to guide the final look
Templates give you the broad style, but the prompt helps refine the details. A short, focused prompt usually works better than an overly long one. You do not need to describe everything in the image. Instead, guide the model toward the elements that matter most: mood, color palette, illustration feel, character expression, or background atmosphere.
For example, if you want a soft anime portrait, you can describe gentle lighting, delicate linework, expressive eyes, and a polished character illustration feel. If you want a bolder result, you can ask for dramatic shading, cinematic color, or a high-energy manga-style portrait.
The goal is not to overwhelm the system. The goal is to help it convert photo to anime style with more intention. In many cases, one strong template plus one short prompt produces a better result than a cluttered request full of conflicting style terms.
Set the format and generate
Before you click generate, check the aspect ratio and resolution settings. These matter more than many users expect. A square or portrait ratio is usually best for avatars and profile images, while a wide ratio may suit banners or thumbnails better. Higher resolution can help if you want a more polished image for posting or printing.
Once you generate the image, evaluate it carefully instead of accepting the first result immediately. Ask yourself a few simple questions. Does the face still look like the subject? Does the anime style feel intentional rather than random? Is the hair rendered cleanly? Does the background support the look or distract from it?
A successful output should feel like a stylized version of the original person, not an unrelated anime character with a vaguely similar pose. If the likeness feels weak, try a better photo, a more suitable template, or a simpler prompt.
Fix common problems when converting a photo into anime art
Most weak results come from predictable issues. Sometimes the face becomes too smooth, the eyes feel overly artificial, or the hairstyle changes too much. In other cases, the image looks attractive but no longer resembles the original subject closely enough.
If that happens, the fix is usually straightforward. Use a cleaner photo. Simplify the prompt. Choose a style template that is less aggressive. Keep the subject larger in the frame. Reduce background complexity.
When you convert image to anime style, the best output is usually the one that balances style with identity. You want the transformation to feel creative, but you still want viewers to recognize the person.
Best ways to use the final anime-style image
Once you have a version you like, there are many ways to use it. Anime-style portraits work especially well for profile pictures, social media posts, creator branding, personal banners, gift art, stickers, and character concept inspiration. They are also useful when you want a more playful or artistic version of a standard photo without commissioning a custom illustration.
HeyDream AI works well for this because the process is simple enough for beginners but flexible enough to reward experimentation. If your first result is only close, do another round. A better input photo, a more fitting template, or a cleaner prompt can make a big difference.
In the end, the easiest way to convert photo to anime style successfully is to think in layers: start with a strong image, choose the right visual direction, guide the look with a short prompt, and only then refine through regeneration. That approach usually produces results that feel more polished, more recognizable, and more worth sharing.
Recommended Tools and Models
- AI Image-to-Image Editor for more controlled edits beyond a direct anime-style conversion
- Seedream 5.0 on HeyDream AI for users who want to understand the model behind the workflow
- HiDream I1 Full for broader creative image generation and stylization
- Nano Banana 2 vs Qwen Image 2.0 vs Seedream 5.0 for model comparison reading
- Photo to Cartoon for readers who want a cartoon-style alternative instead of specifically anime-style output
Related Articles
- HeyDream AI Image Generator Guide: Best Models for Text-to-Image and Image-to-Image
- Seedream 5.0 Image Generation Guide on HeyDream AI (Step-by-Step + Best Tools)
- Nano Banana 2 vs Qwen Image 2.0 vs Seedream 5.0: Which HeyDream Model Fits Your Workflow?
People Also Read
- Nano Banana 2 vs Nano Banana Pro: What Changed and Which One Fits Your Workflow?
- How to Use Seedance 2.0 for Anime Clips: Prompt Examples and Scene Ideas
- How to Create Studio Ghibli Style Art with a Ghibli AI Generator Free Online
- How to Use Sea Imagine AI’s Image Generator: A Beginner-Friendly Tutorial