This Tripo 3D guide explains how to use Tripo 3D 2.5 on HeyDream AI for image-to-3D creation, from choosing a clean reference image to reviewing the generated model draft. It is written for 3D beginners, game designers, ecommerce teams, product designers, toy designers, AR/VR creators, educators, marketers, and concept artists who want faster 3D starting points without skipping the review work that makes a model usable.

Tripo 3D Guide: What Tripo 3D 2.5 Does on HeyDream AI
Tripo 3D 2.5 on HeyDream AI is useful when you need a quick 3D model draft from a product image, prop sketch, furniture photo, character concept, or visual reference. Instead of starting with a blank 3D scene, you begin with a source image and use an AI 3D model generator workflow to create a previewable 3D asset.
The practical value is speed. A marketer can test a product mockup, a game designer can block out a prop, an educator can turn a visual idea into a classroom model, and an AR creator can explore whether an object has enough visual structure for a 3D preview. The result works best as a model draft: useful for exploration, review, concept pitching, and early production planning.
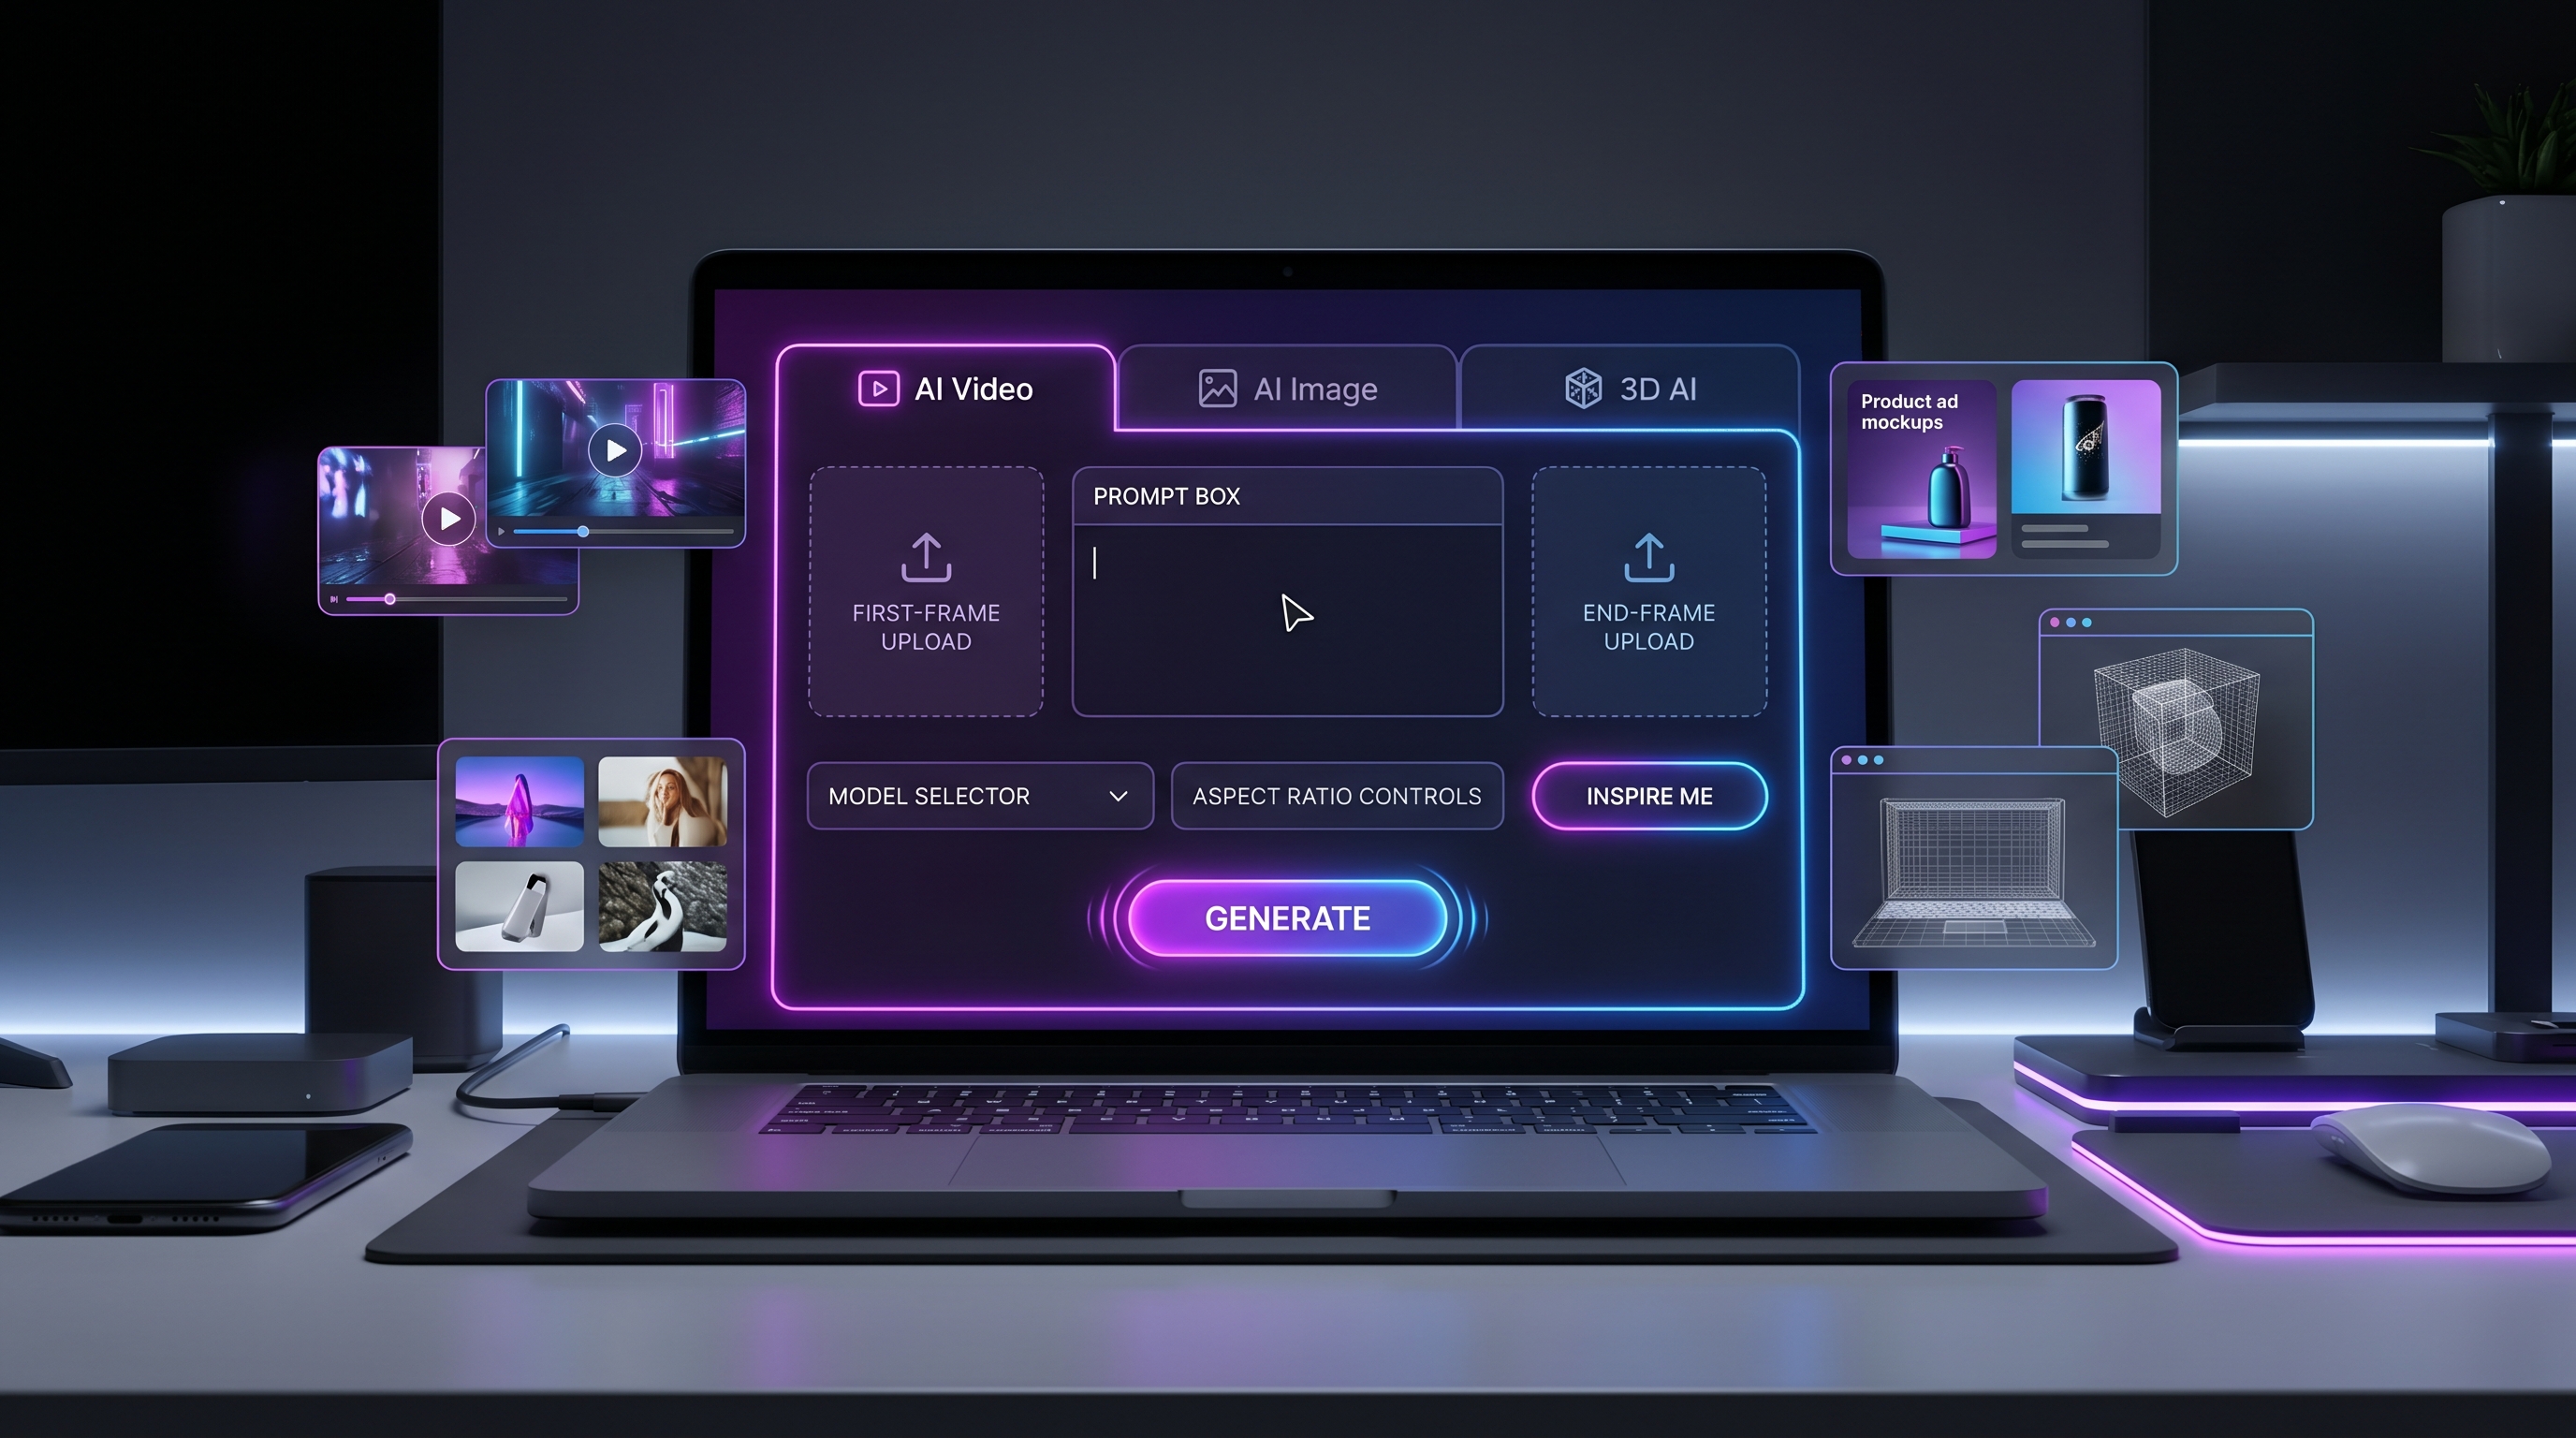
HeyDream AI is a good starting point because it connects the Tripo 3D 2.5 model page with broader creative workflows, including Image to 3D, AI Image Generator, Text to Image, Image to Image, AI Video Generator, Image to Video, and Text to Video. That makes it easier to move from image concept to 3D model draft, then into visual previews or video concepts when the asset direction is clear.
For best results, think of Tripo 3D as a fast visual modeling partner, not a final pipeline replacement. The better your source image, prompt, and review process are, the more useful the generated draft becomes.

How to Prepare Source Images for Image to 3D AI
The source image is the foundation of an image to 3D AI workflow. A clear image gives the model stronger cues about silhouette, depth, materials, color, and object identity. A messy image gives the model too many things to guess.
Use a clean reference image of the object, product, character, or prop you want to turn into a 3D model. The subject should be centered, fully visible, well-lit, and separated from the background. Avoid motion blur, heavy shadows, cropped edges, reflective glare, complex overlapping objects, and unreadable tiny details. The goal is a 3D model suitable for a game prototype, product mockup, AR preview, concept art, 3D printing preparation, or animation draft.
For product work, use images that show the object shape clearly. A sneaker photo should show the sole thickness, toe shape, material contrast, and side profile. A chair photo should show the seat, legs, back support, and scale cues. A package photo should show front dimensions and material direction without relying on tiny printed text.
For character or toy concepts, simplify the reference. Large silhouettes, clear limbs, readable accessories, and distinct color blocks usually work better than dense costumes with tiny ornaments. If the draft will later be cleaned by a 3D artist, prioritize the form that matters most: head shape, body proportions, pose, and accessories.
Multi-image references are especially useful when the subject needs believable depth. Use multiple reference images of the same subject: front view, side view, back view, and 3/4 angle. Preserve the same object identity, proportions, silhouette, material direction, and color palette across all views. Generate a clean 3D model draft with usable geometry, recognizable texture direction, and clear object structure.

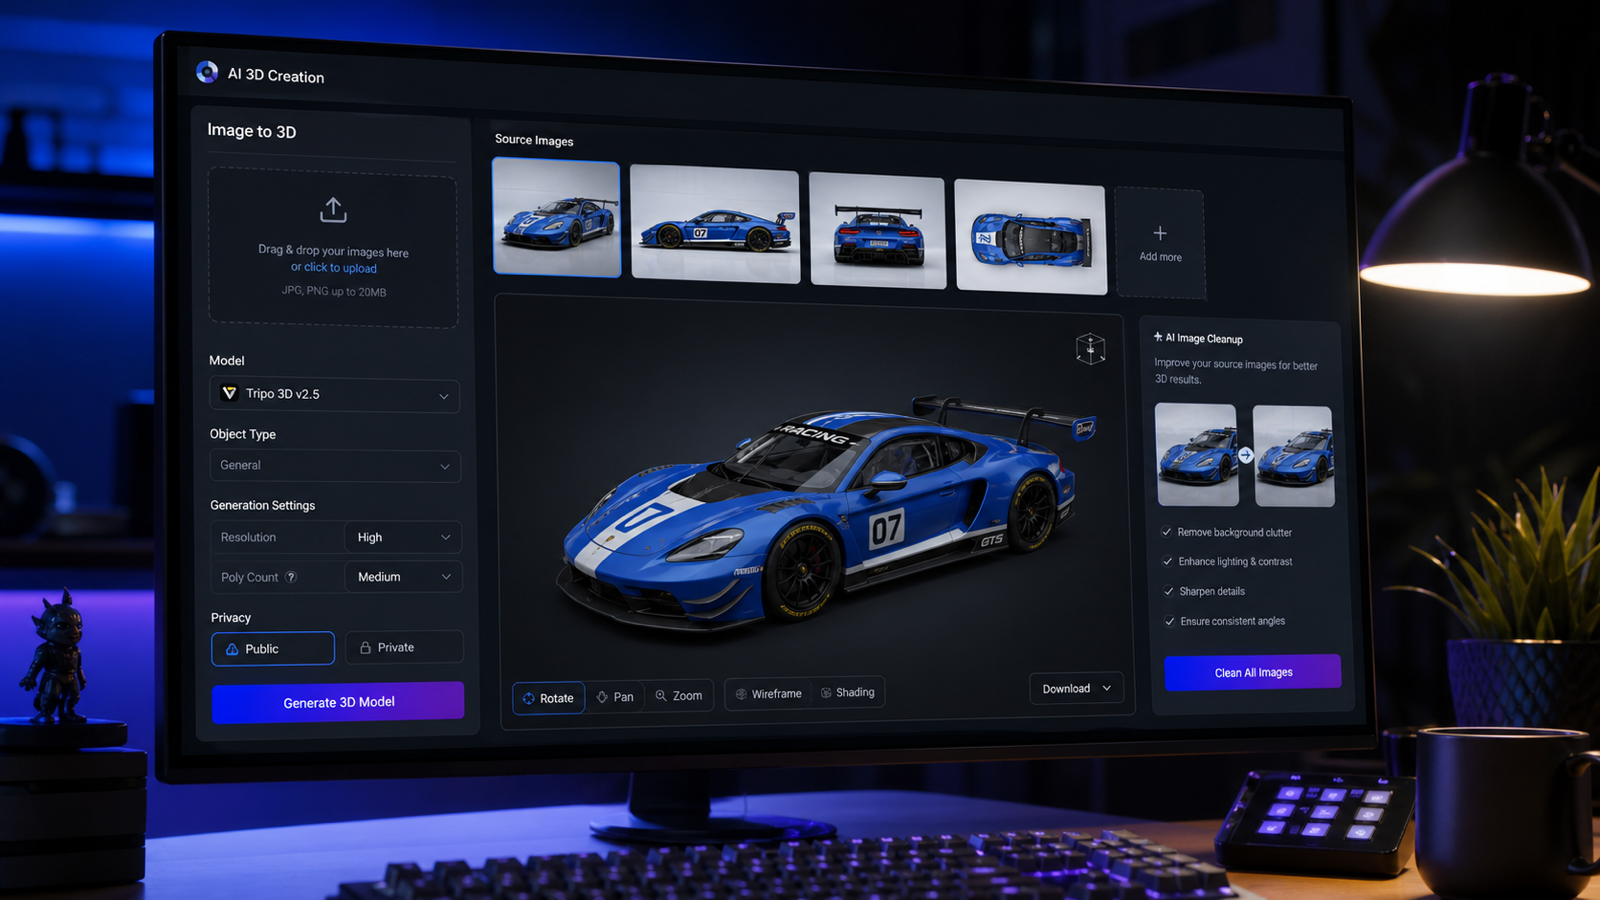
How to Use Tripo 3D 2.5 on HeyDream AI Step by Step
The basic HeyDream AI 3D model generator workflow is simple: choose the Tripo 3D 2.5 page, provide a source image or reference direction, generate the 3D model draft, then inspect the result before deciding what to do next. The important part is not just generating once. It is reviewing, revising, and saving the best version for the right downstream use.
- Open Tripo 3D 2.5 on HeyDream AI.
- Upload a clean source image when the model needs to preserve a product, prop, furniture piece, character, or object design.
- Use multiple views when you need stronger depth guidance, especially for products, furniture, game props, and toys.
- Add a short prompt if the workflow supports it. Describe the object type, material, style, scale, and intended use.
- Choose the visible generation settings on the page, including privacy or public settings when available.
- Generate the model and wait for the preview.
- Rotate the preview and inspect silhouette, back details, surface artifacts, missing parts, and texture alignment.
- Decide whether to regenerate with a better source image, use the draft for concept preview, or send it to a 3D cleanup pipeline.
Use this text prompt support formula when the page or project workflow allows prompt guidance:
Create a 3D model of [object/character/prop/product] with [shape], [material], [style], [scale], and [main details]. The model should be suitable for [game asset / product visualization / AR preview / toy concept / animation prop]. Keep the silhouette clear, avoid tiny fragile details, and prioritize readable form from all angles.
For HeyDream users, a useful workflow is to create or improve a reference image first with Text to Image or Image to Image, then send that cleaner reference into the Image to 3D workflow. This keeps the visual concept and the 3D draft connected.

Prompt Formulas and 12 Tripo 3D Model AI Creation Examples
Good prompts make the model's job narrower. For Tripo 3D model AI creation, avoid trying to describe an entire movie scene. Describe the asset, its shape, material, style, scale, and purpose.
Use this reusable image-to-3D preparation formula:
Use a clean reference image of [object/product/character/prop]. The subject should be centered, fully visible, well-lit, and separated from the background. Avoid motion blur, heavy shadows, cropped edges, reflective glare, complex overlapping objects, and unreadable tiny details. The goal is a 3D model suitable for [game prototype / product mockup / AR preview / concept art / 3D printing preparation / animation draft].
Use this multi-image reference formula:
Use multiple reference images of the same subject: front view, side view, back view, and 3/4 angle. Preserve the same object identity, proportions, silhouette, material direction, and color palette across all views. Generate a clean 3D model draft with usable geometry, recognizable texture direction, and clear object structure.
Use these copy-to-use prompt examples when testing Tripo 3D 2.5 or a related photo to 3D model generator workflow:
- Turn this product photo into a clean 3D model draft. Preserve the product shape, rounded edges, material texture, and main proportions. Keep the model suitable for ecommerce visualization and AR preview.
- Use these front, side, and back images as references. Generate a 3D model of the same object with consistent proportions, clean silhouette, realistic texture direction, and no extra decorative parts.
- Create a 3D model of a small wooden chair with curved legs, smooth oak material, simple seat cushion, clean geometry, and game-ready draft style.
- Turn this toy sketch into a 3D model concept. Preserve the cute silhouette, large head, short limbs, and simple accessories. Make the result suitable for toy design preview.
- Create a 3D model of a fantasy lantern prop with brass frame, frosted glass, small handle, warm glowing center, readable silhouette, and clean low-detail structure.
- Use this sneaker image as the reference. Preserve the shoe proportions, sole thickness, material contrast, and color placement. Generate a 3D draft for product visualization.
- Create a stylized game prop: a worn leather backpack with straps, buckles, side pockets, soft fabric folds, and clear readable form from all sides.
- Turn this furniture image into a 3D model. Keep the table shape, leg placement, wood grain direction, and clean scale. Avoid extra objects from the background.
- Create a 3D model of a ceramic coffee mug with a smooth handle, glossy surface, simple shape, and subtle handmade texture, suitable for a product mockup.
- Generate a 3D character prop from this concept image. Preserve outfit silhouette, main color blocks, hairstyle shape, and accessory placement, but keep the model simple enough for cleanup.
- Create a 3D model of a sci-fi crate with beveled edges, panel seams, metal material, a blank label area, and clean geometry for a game prototype.
- Turn this food package image into a 3D product model draft. Preserve the box dimensions, front-panel layout, and material feel, while avoiding fake readable brand text.
The strongest prompt is usually the one that says exactly what must stay recognizable. If the source image contains background clutter, call that out directly: preserve the object, ignore the background, and avoid adding unrelated parts.

Review Geometry, Textures, Scale, Export, and Real Creator Use Cases
The most useful 3D draft is the one you inspect carefully before using it in a project. Rotate the model and review it from the front, side, back, top, and 3/4 angles. Look for a clear silhouette, clean major forms, believable texture direction, and object identity that still matches the source image.
Use this quality review formula:
Inspect the generated 3D model for silhouette accuracy, geometry cleanliness, texture alignment, surface artifacts, missing back details, scale, holes, floating parts, and export usability. Decide whether it is ready for preview, needs a new source image, or should be cleaned in 3D software.
For game prototypes, check whether the mesh is readable from gameplay distance. For ecommerce and product visualization, check whether the product dimensions, material impression, and front-facing shape still feel accurate. For AR or education, check scale and orientation early. For 3D printing preparation, plan for mesh cleanup, wall thickness review, supports, and format testing in a dedicated 3D tool.
For client or commercial use, add a final handoff check for commercial usage terms, source-image permissions, privacy settings, export options, download rules, texture quality, polygon quality, and any licensing limits shown by the current HeyDream and Tripo pages. These details can change, so keep them in the project checklist rather than baking them into the creative brief.
Where HeyDream AI Fits in a Creator Workflow
HeyDream AI works well as a browser-based creative hub for moving from image idea to 3D draft. A concept artist can create a reference image, generate a 3D model draft, then use Image to Video or AI Video Generator for a visual preview. An ecommerce team can generate product image variants before testing which image creates the cleanest 3D model. A toy designer can compare several silhouettes before sending one model to a specialist for cleanup.
Use Tripo AI and the Tripo Platform Documentation when you need official Tripo context, especially for supported modes, API workflows, text-to-3D details, downloads, or platform-specific usage terms. Use HeyDream pages for the practical creator workflow and the current browser experience.
Related Articles
- Tripo 3D Model AI Creation: How to Turn Images into 3D Models with HeyDream AI
- Image to 3D on HeyDream AI: A Practical Tripo 3D Step-by-Step Guide
- HeyDream AI Website Updates: A New Creative Launchpad for Images, Videos, and 3D
- HeyDream AI Image Generator Guide & Model Comparison
- How to Turn Images Into Better AI Prompts with HeyDream AI
- How to Turn Real Photos into Anime Art with HeyDream AI
People Also Read
- Free Online 3D Viewer: Open and Inspect 3D Models in Your Browser
- Text to 3D Generator with Meshy 3D: Create Better AI 3D Models from Prompts
- Meshy AI vs Tripo 3D AI Review: Which AI 3D Generator Fits Your Workflow?
- Tripo 3D H3.1 Upgrade Guide: What Changed and How to Create Better AI 3D Models
- Best AI 3D Model Generator in April 2026? A Review of Meshy 6
- 3D AI Studio Review: Features, Pricing, and How It Handles Image-to-3D Modeling
- Canva AI 3D Model Generator Review: What It Does Well and What It Doesn’t
- HexaGen Image-to-3D Review: What It Does Well & What Still Feels Unclear
FAQ
Can Tripo 3D turn any image into a finished production model?
It can help create a fast 3D model draft, while production use depends on model quality, cleanup needs, source permissions, export settings, and the final project standard.
Should I use one image or multiple images?
Use one clean image for simple objects and multiple views for products, furniture, toys, characters, and props where the back or side structure matters.
What should I check after generation?
Check silhouette, geometry, texture alignment, scale, holes, floating parts, back details, and whether the model can be exported or cleaned for your intended use.
Can I use HeyDream AI before Tripo 3D generation?
Yes. You can use HeyDream AI image tools to create cleaner references, then use the Tripo 3D 2.5 or Image to 3D workflow to test model drafts.
Conclusion
A practical Tripo 3D guide is less about one-click generation and more about repeatable judgment: choose a clean source image, give the model a focused instruction, inspect the result from all angles, and decide the next production step. On HeyDream AI, Tripo 3D 2.5 is a convenient way to test image-to-3D drafts alongside image, video, and creative workflow tools, especially when you want to move from idea to preview quickly.